3 Ways to add CSS to your Webpage by Valery Johnson
May 03, 2021
Hello again, jewelers! I’m excited to share this post from my good friend and former colleague, Valery Johnson. She is a Software Quality Assurance Specialist whose love for web development has grown as she has increased her development skills through automation. Below she’s shared a few things she’s recently learned about adding CSS styling to webpages.
-- Whitney
Before we begin, if you are not yet familiar with how to create a website I highly recommend checking out this really helpful guide. It’s easy to follow and will come in handy as you try out some of the methods I will share below.
If you are new to web development, like me, you’ve probably checked out a few courses on HTML and CSS. Many of the online courses I found only demonstrated one way of adding CSS to my HTML page (by use of internal CSS) but as I continue expanding my knowledge in the beautiful world of web development, I have learned that there is more than one way of doing things.
As a newbie I have come to realize that the best way to learn something new is to be like Nike and “Just Do It”.
Now then, let’s begin!
1. Inline CSS
- Inline CSS uses the style attribute to help you apply a styling rules to a single HTML element.
- The style attribute specifies properties and values.
- Inline CSS is limited.
- Inline CSS is not recommended to use in bigger projects because it is time-consuming and creates and HTML structure that is harder to maintain due to the fact that you must add CSS rules to every single HTML element on your page.
- Inline CSS is good for previewing small style changes.
An example of inline CSS is shown below. Here we have an inline style to change the text color of an <h1> element as follows:
<h1 style="color:red;">A Red Heading</h1>
The above produces the following result:
A Red Heading
2. Internal CSS
- Internal CSS is used to define styling rules for a single HTML page.
- Internal CSS is not recommended in bigger projects because adding the code to the HTML document can increase the page size and loading time.
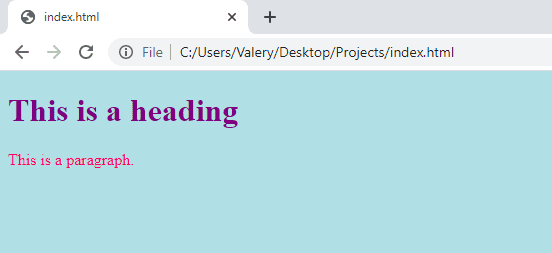
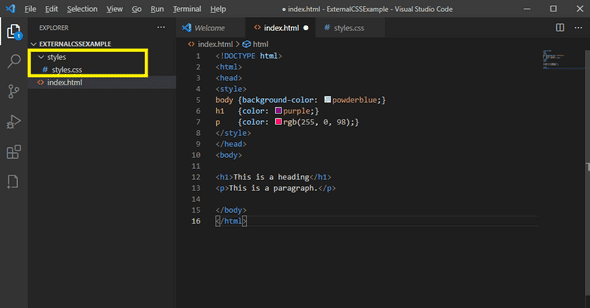
In the example of internal CSS below, you will see where we define our CSS styles in the <head> section of the HTML page within a <style> element.
<!DOCTYPE html>
<html>
<head>
<style>
body {background-color: powderblue;}
h1   {color: purple;}
p    {color: rgb(255, 0, 98);}
</style>
</head>
<body>

<h1>This is a heading</h1>
<p>This is a paragraph.</p>

</body>
</html>
3. External CSS
- External CSS is used by linking an external .css file to your HTML page(s).
- This is the best practice for us as developers as this method gives us the ability to set all of the CSS externally and not have to worry about page load issues, or copy/pasting css code to all of our HTML pages.
Let’s walk through this example together:
1. Add a folder called ‘styles’ to your project
- The name of the folder doesn’t matter, you can name it anything you’d like. All we are essentially doing here is creating an external home for your CSS code.
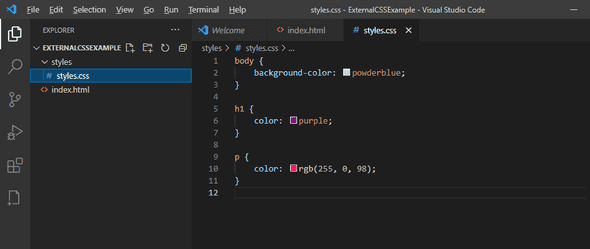
2. Create a .css file
- It is important to use the .css file extension as this defines the file contents.
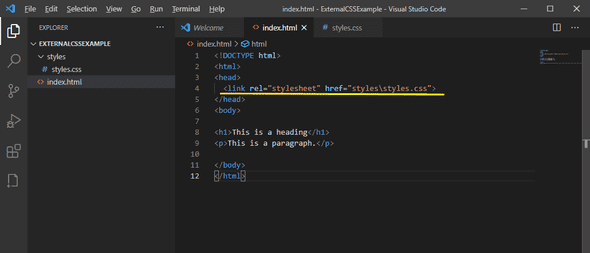
3. Link the stylesheet to your HTML page
- Add a
<link>in the<head>section of your HTML page
- rel defines the relation between the tag and the href
- href references the source of the file you are using
4. Add some “CSS-easoning”
Voila!
Thanks for learning with me.
--Valery
function writeThanks() {
  console.log('Thanks for reading!')
}
Happy Coding! ❤️


